Sunday, 21 May 2017

Ubuntu for the NHS?

Is the NHS looking to Replace it's outdated Window XP with Ubuntu?


Could the NHS really  be considering switching its software infrastructure from Windows to Ubuntu,after Windows XP vulnerabilities were exploited in the recent ransomeware cyber attack that cause severe disruption to several NHS trusts?
News of the "NHSbuntu" platform came to light via Dr Dean Jenkins, a Fellow of the Royal College of Physicians and editor-at-large of BMJ Case Reports, who writes about it on his blog Differential Diagnosis.

According to Dr Jenkins, the Linux-based NHSbuntu is a "modern, secure, open source, operating system being considered by Jeremy Hunt for the NHS."

He adds that as NHSbuntu is built on the "industrial strength Ubuntu desktop," it offers a full-fat security feature set to meet the NHS's needs, including secure email, smartcard authentication and whole disk encryption, plus support for modern web browsers and popular office softtware.

He also notes Ubuntu was found to be the most secure operating system by the UK government's National Technical Authority for Information Assurance (CESG, formerly the Communications-Electronics Security Group), which is part of the National Cyber Security Centre. Although he takes a dig that this assessment was made "more than two years ago."

The NHSbuntu project is currently available to view on GitHub, and news that it is apparently being considered by Secretary of State for Health Jeremy Hunt first appeared on the openhealth hub forums, where user Barry Schofield claims: "I have passed your disc to Jeremy Hunt and he was extremely interested. He is passing it on to his tech people."

It should be noted that while the NHSbuntu platform appears to be real,based on the GitHub code.Reports that it is one of the  software options being considered by the government aren't entirely implausible,but it is not possible to independently verify the claims.

Wishful thinking,or a mischievous dig at IT funding within the NHS,Or could Canonical and Ubuntu really be the cost effective solution to cash strapped NHS trusts?

Fedora:A Brief History

Part four in our series "A Brief History " Looks at Fedora,Red Hat incs,community distro,seen by some as a test bed for Red Hat Enterprise Linux,to others it's a leading light in Linux innovation and technology.

Although Fedora was formally unveiled only in September 2004, its origins effectively date back to 1995 when it was launched by two Linux visionaries -- Bob Young and Marc Ewing -- under the name of Red Hat Linux. The company's first product, Red Hat Linux 1.0 "Mother's Day", was released in the same year and was quickly followed by several bug-fix updates. In 1997, Red Hat introduced its revolutionary RPM package management system with dependency resolution and other advanced features which greatly contributed to the distribution's rapid rise in popularity and its overtaking of Slackware Linux as the most widely-used Linux distribution in the world. In later years, Red Hat standardised on a regular, 6-month release schedule.

In 2003, just after the release of Red Hat Linux 9, the company introduced some radical changes to its product line-up. It retained the Red Hat trademark for its commercial products, notably Red Hat Enterprise Linux, and introduced Fedora Core (later renamed to Fedora), a Red Hat-sponsored, but community-oriented distribution designed for the "Linux hobbyist". After the initial criticism of the changes, the Linux community accepted the "new" distribution as a logical continuation of Red Hat Linux. A few quality releases was all it took for Fedora to regain its former status as one of the best-loved operating systems on the market. At the same time, Red Hat quickly became the biggest and most profitable Linux company in the world, with an innovative product line-up, excellent customer support, and other popular initiatives, such as its Red Hat Certified Engineer (RHCE) certification programme.

Although Fedora's direction is still largely controlled by Red Hat, Inc. and the product is sometimes seen -- rightly or wrongly -- as a test bed for Red Hat Enterprise Linux, there is no denying that Fedora is one of the most innovative distributions available today. Its contributions to the Linux kernel, glibc and GCC are well-known and its more recent integration of SELinux functionality, virtualisation technologies, systemd service manager, cutting-edge journaled file systems, and other enterprise-level features are much appreciated among the company's customers. On a negative side, Fedora still lacks a clear desktop-oriented strategy that would make the product easier to use for those beyond the "Linux hobbyist" target.


  • Pros: Highly innovative; outstanding security features; large number of supported packages; strict adherence to the free software philosophy; availability of live CDs featuring many popular desktop environments
  • Cons: Fedora's priorities tend to lean towards enterprise features, rather than desktop usability; some bleeding edge features, such as early switch to KDE 4 and GNOME 3, occasionally alienate some desktop users
  • Software package management: YUM graphical and command line utility using RPM packages
  • Available editions: Fedora for 32-bit (i386) and 64-bit (x86_64) processors; also live CD editions with GNOME, KDE, LXDE, MATE and Xfce desktops
  • Suggested Fedora-based alternatives: Korora (live DVD with GNOME, KDE, LXDE or Xfce)
  • Suggested Red Hat-based alternatives: CentOS, Scientific Linux


Fedora Gnome Desktop

Thursday, 18 May 2017

KDE Connect.SMS to your desktop...

With KDE Connect you can bridge  the gap between your Linux desktop and your Android phone. 

It allows you to view the notifications from your Android phone on your desktop,and,should you wish, It allows you to respond to text messages through your Linux PC.


KDE Connect also has other useful features.
You can control your Linux computer from your Android device. It even lets you share web pages between devices.


Install KDE Connect on Ubuntu Linux

You don’t need to have KDE installed on Ubuntu to run KDE Connect. It will work well with Unity, GNOME, or whichever desktop environment you’re running.

Since it’s part of KDE, it is available in Ubuntu’s repositories, and is therefore available to most if not all Ubuntu based distros,Mint included,and can be installed directly with the  Apt command.Just open a terminal and copy and paste the following command.


sudo apt update
sudo apt install kdeconnect


In order to get the most out of KDE Connect on non-KDE desktop environments,
you can install a third-party program called Indicator KDE Connect.
It provides integration for other desktop environments via their notification systems.


However to download the indicator, head over to the author’s Github repository and download the latest release as a .deb.

But before you can run KDE Connect  you'll need to install one additional dependency, so open your terminal again and copy and paste the following command.


sudo apt install python3-requests-oauthlib

Then, change directory into your Downloads folder and install the indicator package with dpkg.

Open your terminal again and copy and paste the following command. (Assuming that you downloaded the package to your Downloads folder,if not just substitute Downloads with the actual location you downloaded it to).

cd ~/Downloads
sudo dpkg -i indicator-kdeconnect_0.8.1-amd64.deb


Indicator is a graphical program. You can open it by searching in KDE,Unity etc
There will be two entries. “Settings” one is the one you  need to connect.
The other is the taskbar applet.


Install KDE Connect on Android

KDE Connect for Android is also free and open source. 
It’s available in both the Google Play Store and on F-Droid. 
Either way, you can type in a search for it. 
The app will come right up.Install it like you would any other app on your Android device. 

Sync Android and Linux.

Syncing up your phone is very easy. Open the KDE Connect app on your phone.
Then, open Indicator KDE Connect Settings on your Ubuntu,Mint etc Pc or Laptop.


In the “Settings” window when you see your phone listed in the box to the left, click on it.
The window will change to display information about your phone.
It will also include a “Pair” button. Click on that.
You will receive a notification on your phone of the pair request which you should accept.


With your phone connected, open the regular Indicator KDE Connect from Unity to run the applet.

Testing Out SMS

There are a couple of ways to test out KDE Connect. 
Start with sending and receiving text messages. 
You can either send yourself a message or have a friend do it. If you are sending the test then you need to text your own phone number. 
A dialog box will pop up  with the number that sent the text and the message itself.


Unfortunately, there isn’t a way to reply directly, but you can send a message back.
Click on the applet in the top-right of your screen on Ubuntu. You’ll see the options that are available with KDE Connect.
One of them allows you to send a text message. Select that.


The window that opens is quite basic.
There are two boxes:
One for the number of the recipient and one for the message.
When you’re done, you can send it.
Try sending one to yourself to make sure that it’s working properly.
It’s important to remember that your PC/Laptop isn’t actually sending the message.It’s passing the message along to your phone,so sending a message without a paired Android phone wont work.

Other Connect Features


KDE Connect can open web pages from your phone on your Linux computer. 
You can send interesting pages that you come across on your mobile device to your desktop to view on a larger screen or read later.

KDE Connect is interesting and works just fine,how useful it would be in the real world,rather depends on the end user.


Slackware: A Brief History

Our fifth instalment of " A Brief History",looks at the oldest surviving,and to many,quite simply the best distro,Slackware,not big on hand holding,but designed for stability,and security,with a wealth of documentation available,"learn Slackware,learn linux"


Slackware Linux, created by Patrick Volkerding in 1992, is the oldest surviving Linux distribution. Forked from the now-discontinued SLS project, Slackware 1.0 came on 24 floppy disks and was built on top of Linux kernel version 0.99pl11-alpha. It quickly became the most popular Linux distribution, with some estimates putting its market share to as much as 80% of all Linux installations in 1995. Its popularity decreased dramatically with the arrival of Red Hat Linux and other, more user-friendly distributions, but Slackware Linux still remains a much-appreciated operating system among the more technically-oriented system administrators and desktop users.

Slackware Linux is a highly technical, clean distribution, with only a very limited number of custom utilities. It uses a simple, text-based system installer and a comparatively primitive package management system that does not resolve software dependencies. As a result, Slackware is considered one of the cleanest and least buggy distributions available today - the lack of Slackware-specific enhancements reduces the likelihood of new bugs being introduced into the system. All configuration is done by editing text files. There is a saying in the Linux community that if you learn Red Hat, you'll know Red Hat, but if you learn Slackware, you'll know Linux. This is particularly true today when many other Linux distributions keep developing heavily customised products to meet the needs of less technical Linux users.

While this philosophy of simplicity has its fans, the fact is that in today's world, Slackware Linux is increasingly becoming a "core system" upon which new, custom solutions are built, rather than a complete distribution with a wide variety of supported software. The only exception is the server market, where Slackware remains popular, though even here, the distribution's complex upgrade procedure and lack of officially supported automated tools for security updates makes it increasingly uncompetitive. Slackware's conservative attitude towards the system's base components means that it requires much manual post-installation work before it can be tuned into a modern desktop system.


  • Pros: Considered highly stable, clean and largely bug-free, strong adherence to UNIX principles
  • Cons: Limited number of officially supported applications; conservative in terms of base package selection; complex upgrade procedure
  • Software package management: "pkgtool" using TXZ packages
  • Available editions:Slackware Live Edition. Installation CDs and DVD for 32-bit (i486) and 64-bit (x86_64) processors
  • Suggested Slackware-based alternatives: Zenwalk Linux (desktop), Salix (desktop, live CD), Porteus (live CD with KDE, LXDE, MATE, Razor-qt or Xfce), VectorLinux (desktop)
  • Other distributions with similar philosophies: Arch Linux, Frugalware Linux


Tuesday, 16 May 2017

Ubuntu Unity Security Patch

A security vulnerability has been discovered in the Ubuntu login screen,which would give would-be
attackers unauthorised access to your files.

The issue concerns LightDM, the display manager for the Unity Desktop that powers the Unity Greeter login screen,and affects both Ubuntu 17.04 and Ubuntu 16.10.

LightDM does not correctly confine the guest user session enabled by default on Ubuntu. An attacker with physical access to an affected system could exploit the weakness to gain access to the files or other users on the system, including files in users’ home directories.

Based on discussions in the bug report attached to the issue (which is now public) it seems the move to systemd is (partly) to blame, and explains why earlier versions of Ubuntu (which use upstart) are not affected.

If you’re running a fully up-to-date system you do not need to panic. Canonical has already pushed out an update that temporarily disables Ubuntu guest session logins (so if you noticed it was missing, that’s why).

If you haven’t installed the update,then please do.It’s easy enough: just open the Update Manager, check for updates, and install all critical security patches listed.

While the likelihood of this issue actually being exploited is minimal — remember: someone would need to have physical access to your computer, and need to know about the vulnerability and how to use it,it's reassuring that the security patch required has been made available.

Canonical says it may re-enable guest sessions in a future update but, for now, they’re off by default. Anyone who needs to use guests sessions can knowingly and manually re-enable them.

Ardour 5.9 Released

Ardour 5.9 Open-Source Digital Audio Workstation Released with More Improvements

Ardour 5.9 the hard disk recorder and digital audio workstation application,for Linux, macOS,and Microsoft Windows is updated and ready to rock...


Ardour developer Paul Davis announced the release of yet another maintenance update to his powerful, free, open-source and cross-platform DAW (Digital Audio Workstation) program.

Ardour 5.9 includes several months of changes and improvements made since the previous stable update of the application, and among some notable accomplishments we can mention support for the Presonus Faderport 8 control surface, MIDI enhancements, state serialisation and redraw optimisations.

"Among other things, some significant optimisations were made to redraw performance on OS X/macOS that may be apparent if you are using Ardour on that platform. There were further improvements to tempo and MIDI related features and lots of small improvements to state serialization," reads today's announcement.

Ardour now supports VST effSetBypass plugins
Lots of improvements are also included in Ardour 5.9 for scripting, tempo, control surfaces support, and plugins, and those that caught our attention are new "Ramp to Next" and "Continue" options to the Tempo Marker menu, note name editing support in the MIDI List Editor, and support for the VST effSetBypass plugin.

MIDI maps were added for Korg Studio, Arturia KeyLab 49, and Alesis QX25, the Korg Nano Kontrol2 MIDI map has been updated, it's now possible to disable blinking of alert buttons, and the Audio Setup dialog was improved. Numerous bugs reported by users since Ardour 5.6 or a previous version were also addressed.

Other than that, the OSC surface received a bunch of improvements, and the Japanese and German language translations were updated.


Ubuntu: A Brief History

Part two in our series of " A Brief History" looks at what many would say was the distro that brought Linux to the masses,or at least made it user friendly and accessible

Unbuntu.

The launch of Ubuntu was first announced in September 2004. Although a relative newcomer to the Linux distribution scene, the project took off like no other before, with its mailing lists soon filled in with discussions by eager users and enthusiastic developers.
In the years that followed, Ubuntu grew to become the most popular desktop Linux distribution and has greatly contributed towards developing an easy-to-use and free desktop operating system that can compete well with any proprietary ones available on the market.

What was the reason for Ubuntu's stunning success? Firstly, the project was created by Mark Shuttleworth, a charismatic South African multimillionaire, a former Debian developer and the world's second space tourist, whose company, the Isle of Man-based Canonical Ltd, is currently financing the project. Secondly, Ubuntu had learned from the mistakes of other similar projects and avoided them from the start - it created an excellent web-based infrastructure with a Wiki-style documentation, creative bug-reporting facility, and professional approach to the end users. And thirdly, thanks to its wealthy founder, Ubuntu was able to ship free CDs to all interested users, thus contributing to the rapid spread of the distribution.

On the technical side of things, Ubuntu is based on Debian "Sid" (unstable branch), but with some prominent packages, such as GNOME, Firefox and LibreOffice, updated to their latest versions. It uses a custom user interface called "Unity". It has a predictable, 6-month release schedule, with an occasional Long Term Support (LTS) release that is supported with security updates for 5 years, depending on the edition (non-LTS release are supported for 9 months). Other special features of Ubuntu include an installable live DVD, creative artwork and desktop themes, migration assistant for Windows users, support for the latest technologies, such as 3D desktop effects, easy installation of proprietary device drivers for ATI and NVIDIA graphics cards and wireless networking, and on-demand support for non-free or patent-encumbered media codecs.


  • Pros: Fixed release cycle and support period; long-term support (LTS) variants with 5 years of security updates; novice-friendly; wealth of documentation, both official and user-contributed
  • Cons: Lacks compatibility with Debian; frequent major changes tend to drive some users away, the Unity user interface has been criticised as being more suitable for mobile devices than desktop computers; non-LTS releases come with only 9 months of security support
  • Software package management: Advanced Package Tool (APT) using DEB packages
  • Available variants: Ubuntu, Kubuntu, Xubuntu, Lubuntu, Ubuntu GNOME, Ubuntu MATE, Edubuntu, Ubuntu Kylin, Ubuntu Studio and Mythbuntu for 32-bit (i386) and 64-bit (x86_64) processors;
  • Suggested Ubuntu-based alternatives: Linux Mint (desktop), elementary OS (desktop), Zorin OS (desktop), Pinguy OS (desktop), Trisquel GNU/Linux (free software), Bodhi Linux (desktop with Enlightenment)
 
Ubuntu Unity Desktop


Monday, 15 May 2017

Linux Mint: A Brief History

Part one of our "A Brief History" collection looks at what is probably the most popular "Ubuntu" derivatives currently available.

Linux Mint

Linux Mint, a distribution based on Ubuntu, was first launched in 2006 by Clement Lefebvre, a French-born IT specialist living in Ireland. Originally maintaining a Linux web site dedicated to providing help, tips and documentation to new Linux users, the author saw the potential of developing a Linux distribution that would address the many usability drawbacks associated with the generally more technical, mainstream products. After soliciting feedback from the visitors on his web site, he proceeded with building what many refer to today as an "improved Ubuntu" or "Ubuntu done right".

But Linux Mint is not just an Ubuntu with a new set of applications and an updated desktop theme. Since its beginnings, the developers have been adding a variety of graphical "mint" tools for enhanced usability; this includes mintDesktop - a utility for configuring the desktop environment, mintMenu - a new and elegant menu structure for easier navigation, mintInstall - an easy-to-use software installer, and mintUpdate - a software updater, just to mention a few more prominent ones among several other tools and hundreds of additional improvements. The project also designs its own artwork. Mint's reputation for ease of use has been further enhanced by the inclusion of proprietary and patent-encumbered multimedia codecs that are often absent from larger distributions due to potential legal threats. Perhaps one of the best features of Linux Mint is the fact that the developers listen to the users and are always fast in implementing good suggestions.

While Linux Mint is available as a free download, the project generates revenue from donations, advertising and professional support services. It doesn't have a fixed release schedule or a list of planned features, but one can expect a new version of Linux Mint several weeks after each Ubuntu long term support release. Besides Mint's two "Main" editions which feature the MATE and Cinnamon desktops, the project also builds editions with alternative desktops, including KDE and Xfce. These editions are often completed several weeks after the two "Main" editions and may sometimes miss some of the "minty" tools and other features found in the project's flagship products. Another variant of the Mint line-up is a "Debian Edition" based on Debian's Stable branch. The Debian edition of Linux Mint provides a very stable base while the desktop packages are updated more quickly than in Mint's "Main" editions. Linux Mint does not adhere to the principles of software freedom and it does not publish security advisories.

  • Pros: Superb collection of "minty" tools developed in-house, hundreds of user-friendly enhancements, inclusion of multimedia codecs, open to users' suggestions
  • Cons: The alternative "community" editions don't always include the latest features, the project does not issue security advisories
  • Software package management: Advanced Package Tool (APT) with mintInstall using DEB packages (compatible with Ubuntu repositories)
  • Available editions: A "Main" edition (with MATE and Cinnamon), "Community" editions (with KDE and Xfce), Linux Mint "Debian" edition (with MATE or Cinnamon)
  • Possible alternatives: Ubuntu, elementary OS, Zorin OS, Lubuntu, Xubuntu, Peppermint OS

An example of a Mint desktop


Source distrowatch.com


Debian: A Brief History

Part three in our "A Brief History" we look at one of the oldest and biggest distros out there and one that forms the basis of many.many more distros,Linux Mint and Ubuntu being two of the most popular derivatives.


Debian GNU/Linux was first announced in 1993. Its founder, Ian Murdock, The success of Debian GNU/Linux can be illustrated by the following numbers. It is developed by over 1,000 volunteer developers, its software repositories contain close to 50,000 binary packages (compiled for 8 processor architectures), and it is responsible for inspiring over 120 Debian-based distributions and live CDs. These figures are unmatched by any other Linux-based operating system. The actual development of Debian takes place in three main branches (or four if one includes the bleeding-edge "experimental" branch) of increasing levels of stability: "unstable" (also known as "sid"), "testing" and "stable". This progressive integration and stabilisation of packages and features, together with the project's well-established quality control mechanisms, has earned Debian its reputation of being one of the best-tested and most bug-free distributions available today.

However, this lengthy and complex development style also has some drawbacks: the stable releases of Debian are not particularly up-to-date and they age rapidly, especially since new stable releases are only published once every 1 - 3 years. Those users who prefer the latest packages and technologies are forced to use the potentially buggy Debian testing or unstable branches. The highly democratic structures of Debian have led to controversial decisions and gives rise to infighting among the developers. This has contributed to stagnation and reluctance to make radical decisions that would take the project forward.
envisaged the creation of a completely non-commercial project developed by hundreds of volunteer developers in their spare time. With sceptics far outnumbering optimists at the time, it seemed destined to disintegrate and collapse, but the reality was very different. Debian not only survived, it thrived and, in less than a decade, it became the largest Linux distribution and possibly the largest collaborative software project ever created!

  • Pros: Very stable; remarkable quality control; includes over 30,000 software packages; supports more processor architectures than any other Linux distribution
  • Cons: Conservative - due to its support for many processor architectures, newer technologies are not always included; slow release cycle (one stable release every 1 - 3 years); discussions on developer mailing lists and blogs can be uncultured at times
  • Software package management: Advanced Package Tool (APT) using DEB packages
  • Available editions: Installation CD/DVD and live CD images for 12 processor architectures, including all 32-bit and 64-bit processors from Intel, AMD, Power and others
  • Suggested Debian-based alternatives: Ubuntu, SparkyLinux (Enlightenment, JWM, LXDE, MATE, Openbox, Razor-qt, Xfce), SolydXK (Xfce or KDE), KNOPPIX (LXDE), Tanglu (GNOME, KDE), siduction (LXQt)

Debian with Gnome Desktop


Bitdefender Rescue CD

With a worldwide network of 500 million machines, Bitdefender has the largest security delivery infrastructure on the globe. Performing 11 billion security queries per day, Bitdefender detects, anticipates and takes action to neutralize even the newest dangers anywhere in the world in as little as 3 seconds.

Innovation has earned us the trust of families and corporations from over 150 countries and has won us a wealth of awards.

But what if you already suspect that your PC or Laptop has been infected ?
The the solution might just be the Bitdefender Rescue Cd.

Before proceeding with the creation of your Rescue Cd it is recommended,where possible, not to use the infected Pc/laptop and to perform these instructions on another machine.

How to create a Bitdefender Rescue CD

Bitdefender Rescue CD is a free tool that scans and cleans your computer whenever you suspect a malware threat is affecting its operation. Bitdefender Rescue CD works without loading the operating system and can be set up either on a CD/DVD or on a USB flash drive.

Creating a Bitdefender Rescue CD on a CD/DVD

To create a Bitdefender Rescue CD on a CD/DVD you need the ISO image which care be downloaded from here and an image burning application. In the example below we used InfraRecorder, a free tool compatible with Windows 7 or earlier; the application can be downloaded from here.
For Windows 8, you can use Windows Disc Image Burner; find more details Here

To burn an image with InfraRecorder:

• Insert a blank CD into the CD/DVD drive.

• Open InfraRecorder and choose Write Image. A browser window will appear.

• Go to the location where you have saved the ISO file.

• Select the file and click Open. A configuration window will display the recommended settings for the current task.

• Click OK. The CD is ejected after the writing process finishes.

• Go to the infected computer and boot it with the CD you have just created.

Creating a Bitdefender Rescue CD on a USB flash drive

When you cannot write a CD/DVD, you can use a USB flash drive. Bitdefender recommends Stickifier, a free open-source tool that creates a bootable Rescue CD on a USB flash.

Download Stickifier using the convenient link:

Stickifier executable(no installation required)

Stickifier source files

To save Bitdefender Rescue CD on a USB drive with Stickifier:

Open Stickifier and a wizard will take you through the necessary steps.
  1. First you need to select the image source location from the available options:
Download from the Internet- Save the image to your computer directly from
  Stickifier.
  Use the  Browse button to indicate the destination folder.

Select an existing ISO image, which you previously downloaded from the Bitdefender download page. Use the  Browse button to indicate the source folder.


2. Click Next. In the new window, you need to provide the target removable drive for the Bitdefender Rescue CD files. 


3. Mount the flash drive into the USB port and select the drive letter from the dropdown list.

NOTE:Before plugging in the flash drive, make sure it meets the requirements mentioned in the current window.

If the letter does not appear in the list, click the Refresh button.

4. Click Next. The installation process starts and the progress bars show the status of your installation.

5. When the installation is complete, click Finish. The flash drive is now ready to be used on the infected computer.


NOTE: The Bitdefender Rescue CD tool requires an Internet connection to be automatically updated each time you use it. For details on how to use the Bitdefender Rescue CD Click Here


How to Burn an ISO

A simple Guide to Burning an ISO image.

In this tutorial I'll show you how to burn an ISO image to CD/DVD using Xfburn on Linux Mint

Xfburn is the default burning application in the Xfce desktop environment,as well as being capable of burning data compositions,for back ups,and audio CD's, it also provides us the option of burning a bootable live linux ISO image to a CD/DVD. 

After starting Xfburn click on the Burn Image button:


Next, click the Image to burn button,navigate to the location of the ISO you want to burn and click Open. 


This will add the ISO to the Image to burn box.


You can go with the default burn speed,but I usually go for the slowest available,in this case that's 8.
The simply click the Burn image button and your ISO will be burnt to the disc.When finished if it hasn't done so eject the disc.

Congratulations you've now got a live Linux Mint disc .

This guide also applies to any other Linux ditsro running the XFCE desktop and the principles are pretty much the same when burning an ISO using another Linux CD/DVD burner ( K3b,Brasero ect )


Canonical going public?


Early last month we reported that, Canonical, the company behind the Ubuntu distribution, was ceasing development of its Unity desktop environment and Ubuntu Touch mobile operating system.
Part of the reason for Canonical dropping these desktop and mobile technologies was maintaining them was expensive and a drain on the company's resources.
Also, according to a recent ZDNet article, Canonical may be transitioning from a private company to a publicly traded company.
Canonical's founder, Mark Shuttleworth, has expressed an interest in focusing on the cloud and server technologies which make Canonical money in order to make the organization more appealing to potential investors.

The article shares some quotes from Shuttleworth discussing taking Canonical public: "This move also means Canonical will devote more of its time to 'putting the company on the path to an IPO. We must figure out what steps we need to take moving forward.'
That means focusing on Canonical's most profitable lines. Specifically, 'Ubuntu will never die. Ubuntu is the default platform on cloud computing. Juju, MaaS, and OpenStack are nearly unstoppable.
We need to work out more of our IoT path. At the same time, we had to cut out those parts that couldn't meet investors' needs.

The immediate work is to get all parts of the company profitable.


Transfer the ISO content to a medium

Transfer the ISO content to a medium

  • You can burn the ISO file to a CDROM medium (only the XFCE Edition fits on a CD) or to a DVD,using your favorite burning program like k3b (KDE), xfburn (XFCE), xcdroast (plain X-Window) or brasero (GNOME)… or a Windows burning program if you want.
    Make sure you inform the application that this is a bootable ISO, i.e. do not simply burn the contents of the ISO to a disk.
  • Or, you use the program ‘dd’ or else ‘cp’ to transfer the ISO to a USB stick (aka flash drive). Any of the following two commandlines will do the job, provided your USB stick is known by your Linux computer as “/dev/sdX“. Note that sdX means the whole disk, not a partition on the disk!
    $ dd if=slackware-live-14.2.iso of=/dev/sdX
    $ cp slackware-live-14.2.iso /dev/sdX
    This creates a read-only bootable USB medium containing Slackware Live. Readonly means that you will not get persistence this way. This method is similar to using a DVD medium. If you want a writable USB stick instead, read the next option.
  • You can use the ‘iso2usb.sh’ script to transfer the content of the ISO to a USB stick, thereby adding persistence to the Live OS on the stick. The stick will remain writable and you can add new modules later on if you want.
    You can find extensive documentation on the usage of that script on the Slackware Documentation Wiki.

Ready to Boot your new Slackware Live? Click HERE

Booting Slackware Live Edition

Booting the Live OS

When you boot Slackware Live on a BIOS computer, Syslinux will handle the boot and show the following menu:
  • Start (SLACKWARE | PLASMA5 | XFCE | MATE) Live (depending on which of the ISOs you boot)
  • Non-US Keyboard selection
  • Non-US Language selection
  • Memory test with memtest86+
You can select a keyboard mapping that matches your computer’s. And/or boot Slackware in another language than US English. You will probably want to change the timezone; syslinux allows you to edit the boot commandline by pressing <TAB> because the syslinux bootmenu does not offer you a selection of timezones.
On UEFI computers, GRUB2 handles the boot and it will show a menu similar (and similarly themed) as the Syslinux menu:
  • Start (SLACKWARE | PLASMA5 | XFCE | MATE) Live (depending on which of the ISOs you boot)
  • Non-US Keyboard selection
  • Non-US Language selection
  • Non-US Timezone selection
  • Memory test with memtest86+
Editing a Grub menu is possible by pressing the ‘e’ key. After making your changes to the boot commandline, press <F10> to boot.
Another difference between Syslinux and Grub menus: in Grub you select keyboard, language and/or timezone and you’ll return to the main menu every time. You still have to select “Start Slackware Live” to boot. In the Syslinux menu, only the keyboard selection menu will return you to (apparently bot not actually) the same main menu. The non-US language selection will boot you into Slackware Live immediately without returning to the main menu. A limitation of syslinux.

Things to remember when you boot the ISO

Slackware Live does not log you on automatically! This is a demonstration environment, with the purpose of getting you acquainted with Slackware, remember? Therefore you will first see all these intimidating kernel messages scrolling across the screen while booting the OS. Then you need to login manually.
The Slackware Live Edition comes with two user accounts: user ‘root’ (with password ‘root’) and user ‘live’ (with password ‘live’). My advice is to login as user live and use “su” or “sudo” to get root access.
Note: the “su” and “sudo” commands will ask for the ‘live’ user’s password!
Consult the documentation for assistance with the various boot parameters you can use to tailor the Live OS to your needs. The syslinux boot has help screens behind the F2, F3, F4 and F5 function keys and the grub boot screen has a “help on boot parameters” menu entry.

Not sure how to burn the ISO to a disk? Click HERE

Install Slackware Live?

Install the Live OS to your hard drive easily. The included program “setup2hd” (all ISOs except the small XFCE variant) is a modified Slackware installer which will guide you through the familiar setup menus and install the content of the Slackware Live Edition to your hard disk. The “setup2hd” program can be run from your X session so that you can keep interacting with the Internet while Slackware installs itself.


Start the built in PXE server and let the whole LAN run Slackware Live

Load the Live OS into RAM using the “toram” boot parameter and then start “pxeserver” from an X terminal. All computers in your LAN will be able to boot Slackware Live Edition from the network now. Ideal for a hackfest.

Download the ISO images.

As stated above, you can choose between several variants of Slackware Live Edition. ISO images for the SLACKWARE, XFCE, PLASMA5 and MATE flavours using the latest Slackware-current packages are available.

The ISO images (with MD5 checksum and GPG signature) are available on the master (bear) and its mirror servers. A symlink called “latest” will always point to the latest set of ISO images.

Primary location: http://bear.alienbase.nl/mirrors/slackware-live/ (rsync://bear.alienbase.nl/mirrors/slackware-live/)
Darren’s mirror (also fast!): http://slackware.uk/people/alien-slacklive/ (rsync://slackware.uk/people/alien-slacklive/)
Willy’s mirror: http://repo.ukdw.ac.id/slackware-live/
Ryan’s mirror: https://seattleslack.ryanpcmcquen.org/mirrors/slackware-live/
Shasta’s mirror: http://ftp.slackware.pl/pub/slackware-live/(rsync://ftp.slackware.pl/slackware-live/)
Tonus’s mirror: http://ftp.lip6.fr/pub/linux/distributions/slackware/people/alien-slacklive/

And if you love the bleeding edge, an ISO file for slackware64-current is automatically (re-)generated every time there is an update to the ChangeLog.txt of Slackware-current. You can find this ISO image here:

 http://bear.alienbase.nl/mirrors/slackware/slackware-live/slackware64-current-live/ (before downloading this ISO, check the ISO-generation log file for errors)

Want more info on the Slackware Live Edition? Click HERE


Source Alien Pastures

What is Slackware Live?

What is Slackware Live Edition?

Slackware Live Edition:

It is a version of Slackware (14.2 and newer)  that can be booted and run directly from a DVD or a USB stick.
It is distributed as an ISO image and meant to be a showcase of what Slackware is about.
You get the default install, no customizations, but with all the power.
You do not have to install Slackware to your harddisk first to experience it first-hand.

 Liveslak:

The combination of scripts, bitmaps and configurations to generate the ISO images are called project “liveslak“. 

The stated reasons the developer had for starting this “liveslak” project (apart from sheer curiosity):
  1. Provide a Live version of Slackware proper – i.e. show Slackware as it is, but without having to install it. No hiding of kernel messages scrolling across the screen at boot – no custom wallpapers, etcetera. Meant for education and demonstration purposes.
  2. The target should be slackware-current – the bleeding edge. Many people want to know what that looks like but are hesitant to install slackware-current for fear that it breaks stuff and causes productivity loss.
  3. Provide a way to generate a Live ISO with just Slackware packages as the source – fully scripted and deterministic.
  4. Still be able to customize its content – for instance provide stripped-down or minimalist versions of Slackware but also allow for the inclusion of 3rd party packages.
  5. Option to create a bootable USB stick running Slackware Live (which is different from ‘dd’-ing the hybrid ISO to a USB stick!)
  6. Keep It Simple Stupid!
 ... but I had not anticipated the expansion of scope that can be attributed to the people who have been testing all the Beta versions. They came up with real-life use-cases, worthwhile additions and fixes. Thanks go out to all of you!
The “liveslak” is so much more now than when initially conceived.
Instead of being just a simple demo-toy it is now usable as a full-blown Live work environment in its own right.

Highlights of Slackware Live Edition.

The Slackware Documentation Project contains extensive documentation about “liveslak“, both for users of the Live OS and for people who want to know “how it works”  and want to develop a custom Live OS.
Check it out please, in particular all the boot options for the Live OS.
Good hardware support

The Live OS boots on “good old” BIOS computers but also on modern UEFI hardware (disable secure boot first). The kernel and userland software in the OS is fully up to date and supports modern and older hardware. If your computer is does not support a 64bit Operating System then you can just download the 32bit version of Slackware Live Edition.

Persistence

Slackware Live Edition is persistent if you install its ISO to a USB stick using the “iso2usb.sh” script. Persistence of a Live OS means, the things you change or add (or delete) are stored on the USB medium and will survive a reboot. As opposed to the raw ISO image (burnt to a DVD or ‘dd’-ed to a USB stick) which is a pure Live OS where all your modifications are written to a RAM disk and gone when you reboot.

A feature I consider crucial for a persistent Live OS on a USB stick that you carry around with you in your jacket pocket is… data protection!

Data encryption

How do you protect the stuff you are accumulating in your live user’s home
directory, such as passwords, confidential documents, GPG and SSH keys etc?
You lose the USB stick, someone else may steal it – your sensitive files will be compromised.
Therefore the Slackware Live Edition offers you the option to create a LUKS-encrypted container file in the Linux filesystem of the USB stick.The filesystem inside that encrypted container will then be mounted on the /home directory of the Live OS when it boots.
The LUKS passphrase you entered when creating the container, will be prompted for during the boot-up of the Live OS. On shutdown, the container will be locked again and a potential thief of your USB stick will be unable to get to the files in the LUKS container (i.e. your homedirectory).

Multiple OS variants or flavors.

The “liveslak” scripts are able to generate a variety of Slackware Live ISO flavors: SLACKWARE, XFCE, PLASMA5, MATE, CINNAMON, CUSTOM. The locations where you can download these ISO files are shown in the next paragraph.

  • By default, “liveslak” creates a 2.6 GB large ISO from scratch that will give you a complete 64bit Slackware-current Live Edition.
  • The scripts can also create a 700 MB slimmed-down XFCE version with XDM as the graphical login manager which fits on a CDROM medium or a 1 GB USB stick.
  • A 3.0 GB ISO image of Slackware64-current containing Plasma 5 instead of KDE 4 is also an option. The PLASMA5 variant is spiced up with several other packages I maintain: vlc, libreoffice, calibre, qbittorrent, ffmpeg, chromium, openjdk, veracrypt.
  • The option to generate a 1.7 GB ISO containing either the Mate or the Cinnamon desktop instead of Slackware’s own KDE 4 could be added courtesy of Willy Sudiarto Raharjo’s repositories.
  • The “liveslak” scripts allow a large degree of customization so that you can create “your own” variant of a Slackware based Live OS. One example of what’s possible is the Live Edition of Cinelerra CV.

No custom kernel or 3rd party tools needed

The main script “make_slackware_live.sh” creates an ISO from scratch. The script installs Slackware packages or package sets into compressed “squashfs” modules, configures and optimizes the target filesystem to be run as a Live environment, and then generates an initial ramdisk that will assemble the Live environment when you boot. All that is put into a bootable ISO image file. Thanks to Linux kernel 4.x and the squashfs-tools package added to Slackware 14.2, the process requires no compilation nor does it need non-standard packages to create a Slackware Live Edition (of course, the Plasma, Mate and Cinnamon flavours do require 3rd party packages). The downside is that the ISO has to be created on Slackware 14.2 (older versions of Slackware do not have the proper tools or kernels). It follows that the only Slackware release which is supported as a Live Edition is 14.2 and the “-current” development tree. All future releases will be supported too of course.

Want to install Slackware Live? Find out how HERE

Sunday, 14 May 2017

Haiku devlopments


The Haiku project develops an open source, spiritual successor to BeOS. The Haiku project has announced a number of developments which improve the user experience of their lightweight operating system. 
Some of these changes include expanding support for video formats in the operating system's media player, fixing compatibility issues between Haiku's file system and BeOS's implementation of BFS, and a graphical update manager is now included in the default installation. "Brian Hill continues his work on the Software Updater, which is now included in the default image, and almost ready for production. 
This tool will be used to notify the user when updates are available in the repositories, and automatically apply them. No need to go to pkgman in the command line for this anymore." 
Further details on Haiku's progress can be found in the project's newsletter.

Linux Mint updates and retirements announced


The Linux Mint team's monthly newsletter for April included a number of significant announcements. The newsletter reported that Linux Mint 13 has reached the end of its supported life cycle. Version 13 of Linux Mint was a long term support release launched back in 2012 and it received five years of support. Anyone still using version 13 is encouraged to read this forum post on upgrading to a newer, supported version of the distribution.

Mint's newsletter also mentioned that version 1.18 of the MATE desktop will soon be available to people running Linux Mint Debian Edition.
Further, the recent release of the Cinnamon 3.4 desktop will include a number of stability improvements: "In the upcoming Cinnamon 3.4 the settings daemon will be split into multiple processes. Each plugin (i.e. area of responsibility) will run its own process, making it easy to identify excessive CPU or memory usage and isolating crashes to only affect a particular plugin without impacting the rest of the desktop. Similarly, Nemo (the file manager) will be split into two separate processes.
One for the desktop icons, which will run in isolation, and one for the file manager windows." Further details and more changes coming to Mint can be found in the newsletter

How to scan your computer with Bitdefender Rescue CD

How to scan your computer with Bitdefender Rescue CD


Here's how to use Bitdefender Rescue CD to quickly scan and disinfect an infected operating system that cannot start normally:

1. First, you need to boot the computer from a device which has Bitdefender Rescue CD on it. For details on how to create a Bitdefender Rescue CD, click Here.

• When booting from a local removable device, plug in the USB device or insert the CD/DVD into the infected computer.

• Reboot the computer.

• During the boot process, go to the Boot Menu by pressing the appropriate key, as displayed on the screen. Most common keys are: F8, F10, F12 or ESC, depending on the model of the computer.

• Choose the device to boot from: USB device or CD/DVD device.

NOTE: In some cases, when you boot from the rescue CD, you will be required to enter a user name and a password. In such cases, type the username ”livecd” and leave the password box empty. Keep in mind that while typing the password, nothing will be displayed on the screen. Just type it on your keyboard and press Enter.

NOTE: Sometimes, after entering the username and the password, the system will remain in command prompt. To fix this, you need to type in the startx command and press the Enter key.


2. Select Start the Bitdefender Rescue CD in English from the option menu and press ENTER. The Bitdefender Rescue CD will load and it will display the welcome screen

3. To continue using the product, you must read and agree to the License Agreement. Select the corresponding check box and click Continue. Bitdefender scanner will automatically update and start to scan all local drives.

4. When the scan is complete, remove or quarantine any infection found.

5. Exit Bitdefender Rescue CD and reboot your computer:

• From the lower-left corner of your desktop screen, click the  Bitdefender icon and then select Log Out. The Log Out window will appear.

• Click  Restart and wait for the computer to boot normally.

6. Eject the device you have used.

Saturday, 13 May 2017

A quick intro to Linux Mint


The purpose of Linux Mint is to produce a modern, elegant and comfortable operating system which is both powerful and easy to use.
Linux Mint is one of the most popular desktop Linux distributions and used by millions of people.
Some of the reasons for the success of Linux Mint are:
  • It works out of the box, with full multimedia support and is extremely easy to use.
  • It's both free of cost and open source.
  • It's community-driven. Users are encouraged to send feedback to the project so that their ideas can be used to improve Linux Mint.
  • Based on Debian and Ubuntu, it provides about 30,000 packages and one of the best software managers.
  • It's safe and reliable. Thanks to a conservative approach to software updates, a unique Update Manager and the robustness of its Linux architecture, Linux Mint requires very little maintenance (no regressions, no antivirus, no anti-spyware...etc).
Source Linux Mint.com

Introducing Clam Av


ClamAV® is an open source (GPL) anti-virus engine used in a variety of situations including email scanning, web scanning, and end point security. It provides a number of utilities including a flexible and scalable multi-threaded daemon, a command line scanner and an advanced tool for automatic database updates.   Features
  • Command-line scanner
  • Milter interface for sendmail
  • Advanced database updater with support for scripted updates and digital signatures
  • Virus database updated multiple times per day
  • Built-in support for all standard mail file formats
  • Built-in support for various archive formats, including Zip, RAR, Dmg, Tar, Gzip, Bzip2, OLE2, Cabinet, CHM, BinHex, SIS and others
  • Built-in support for ELF executables and Portable Executable files packed with UPX, FSG, Petite, NsPack, wwpack32, MEW, Upack and obfuscated with SUE, Y0da Cryptor and others
  • Built-in support for popular document formats including MS Office and MacOffice files, HTML, Flash, RTF and PDF
  • High detection rates for viruses and spyware;
  • Scanning Scheduler;
  • Automatic downloads of regularly updated Virus Database.
  • Standalone virus scanner and right-click menu integration to Microsoft Windows Explorer;
  • Addin to Microsoft Outlook to remove virus-infected attachments automatically.

Please note that ClamWin Free Antivirus does not include an on-access real-time scanner. You need to manually scan a file in order to detect a virus or spyware.

Linux Mint 18 Cinnamon

New features in Linux Mint 18 Cinnamon

Linux Mint 18 is a long term support release which will be supported until 2021. It comes with updated software and brings refinements and many new features to make your desktop experience more comfortable to use.


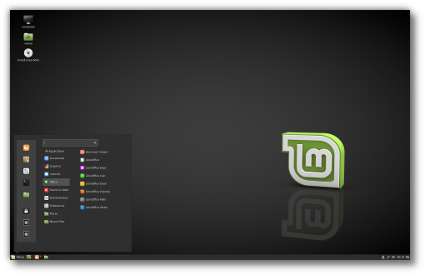
Linux Mint 18 "Sarah" Cinnamon Edition

X-Apps

A new project called "X-Apps" was started and its goal is to produce generic applications for traditional GTK desktop environments.
The idea behind this project is to replace applications which no longer integrate properly outside of a particular environment (this is the case for a growing number of GNOME applications) and to give our desktop environments the same set of core applications, so that each change, each new feature being developed, each little improvement made in one of them will benefit not just one environment, but all of them.
The core ideas for X-Apps are:
  • To use modern toolkits and technologies (GTK3 for HiDPI support, gsettings etc..)
  • To use traditional user interfaces (titlebars, menubars)
  • To work everywhere (to be generic, desktop-agnostic and distro-agnostic)
  • To provide the functionality users already enjoy (or enjoyed in the past for distributions which already lost some functionality)
  • To be backward-compatible (in order to work on as many distributions as possible)
Within Linux Mint, you won't need to adapt to X-Apps, because in many cases, they're very similar or exactly the same as the applications you were already using. For instance, Totem 3.18 (which is available in the Linux Mint 18 repositories) is radically different than Totem 3.10 which shipped with Linux Mint 17, but Xplayer 1.0 (which is the default media player in Linux Mint 18) is exactly the same. The goal of the X-Apps is not to reinvent the wheel. Quite the opposite in fact, it's to guarantee the maintenance of applications we already enjoyed and to steer their development in a direction that benefits multiple desktop environments.
Xed is based on Pluma and acts as the default text editor.


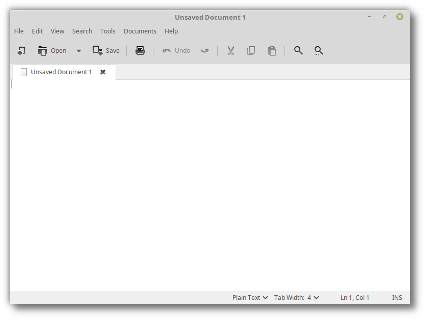
Starting a new text file in Xed
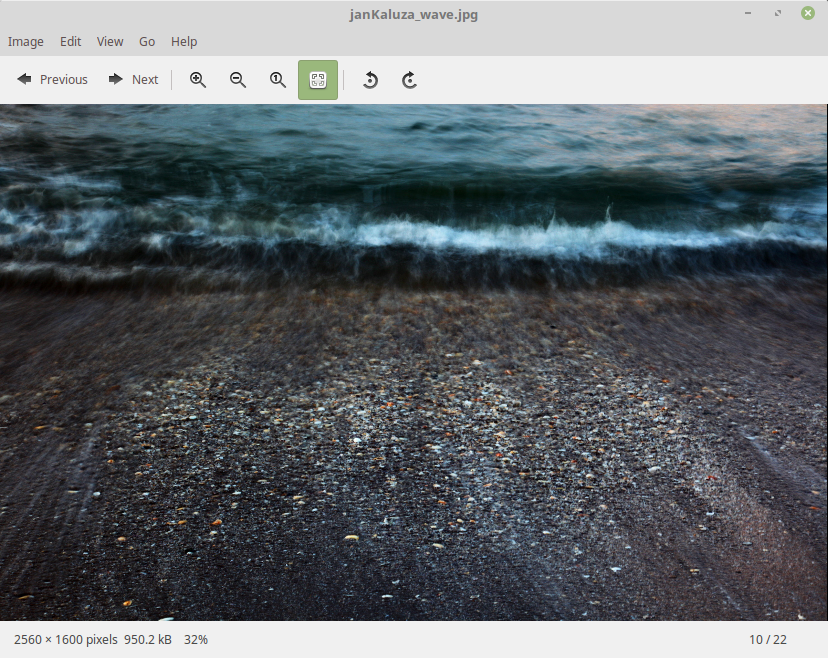
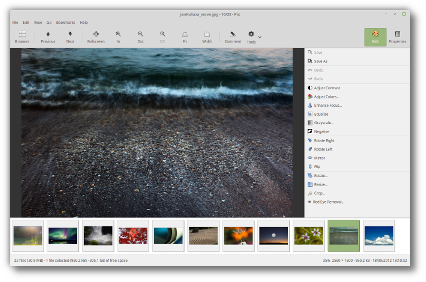
Xviewer is based on Eye of GNOME and acts as the default image viewer.

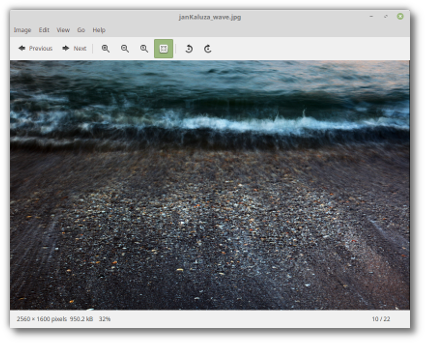
Viewing a picture in Xviewer
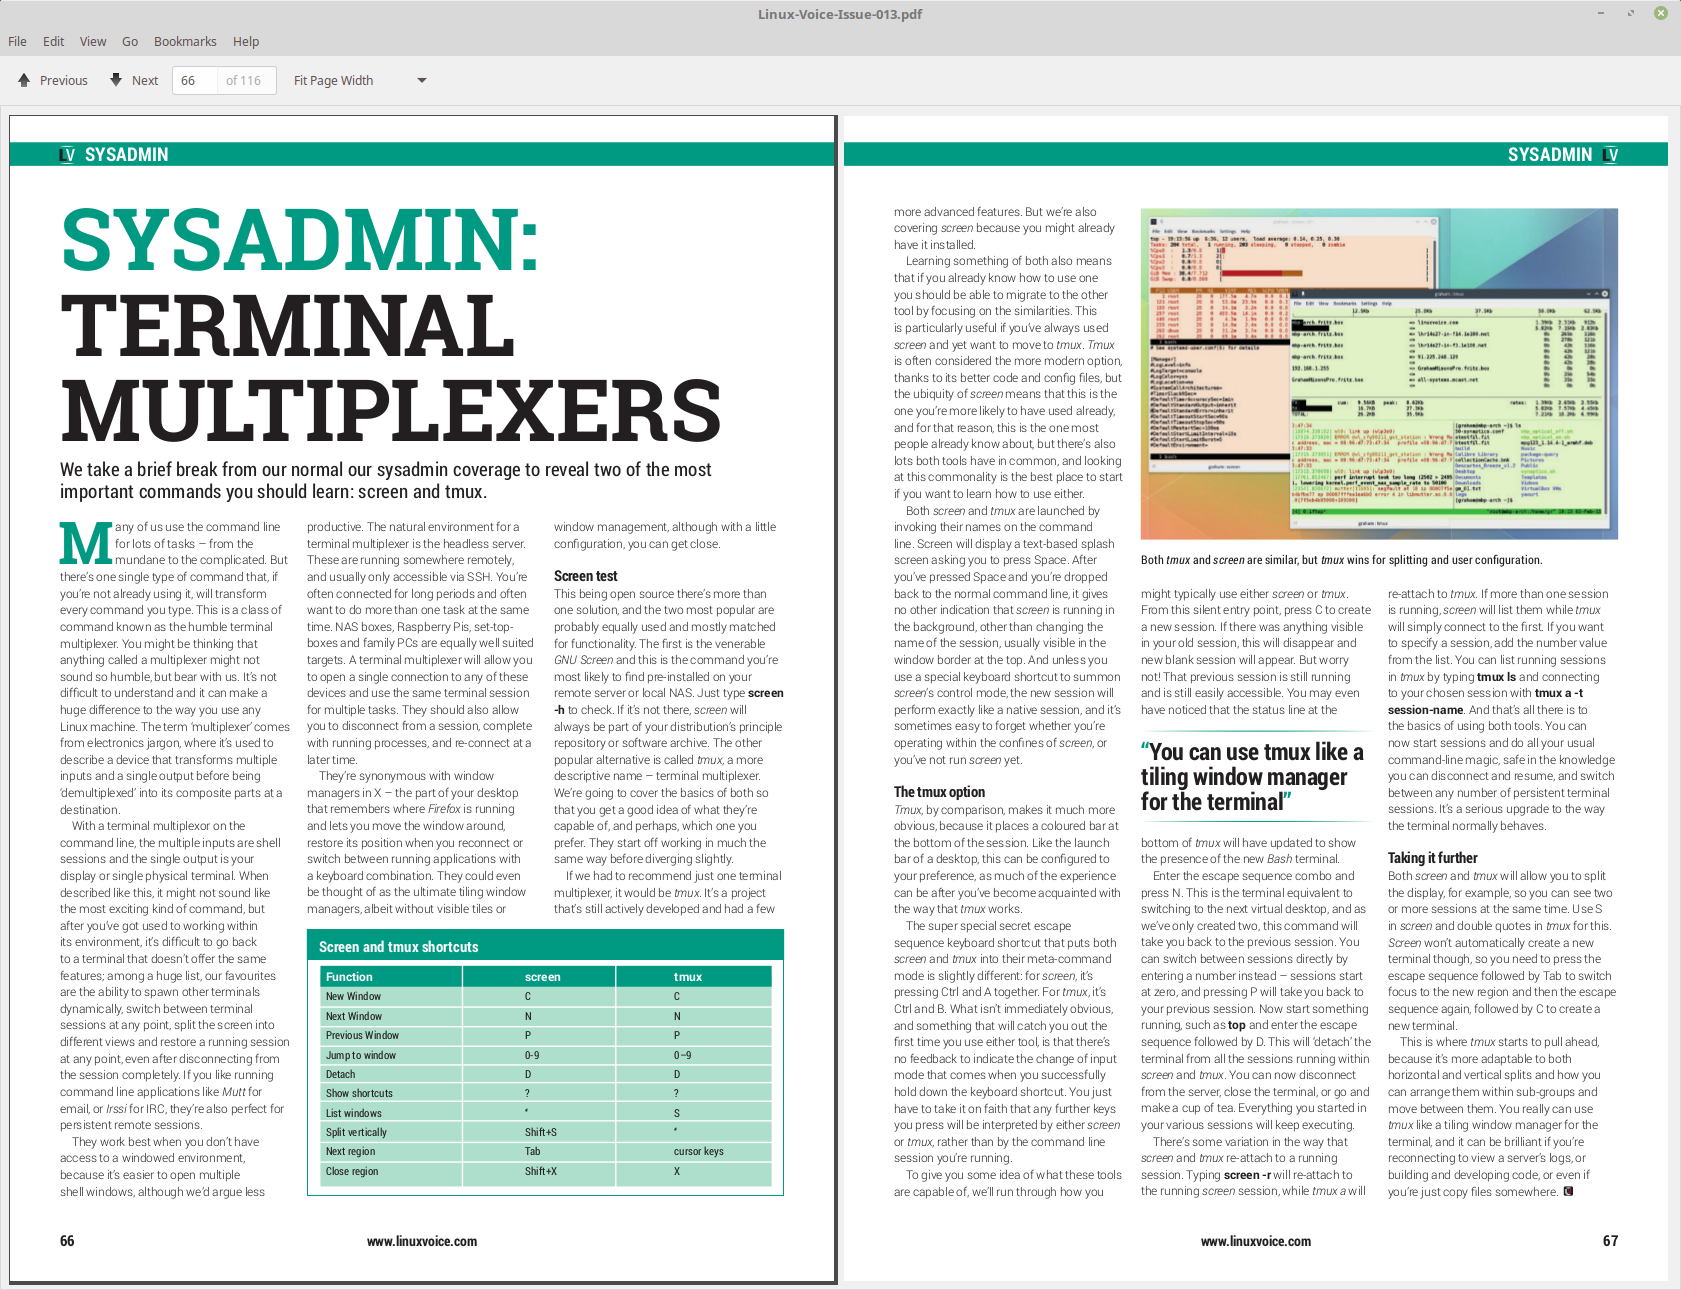
Xreader is based on Atril and acts as the default document and PDF reader.

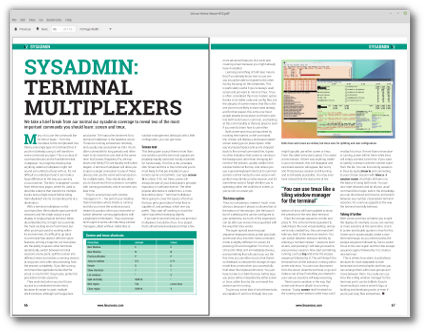
Reading a magazine in Xreader
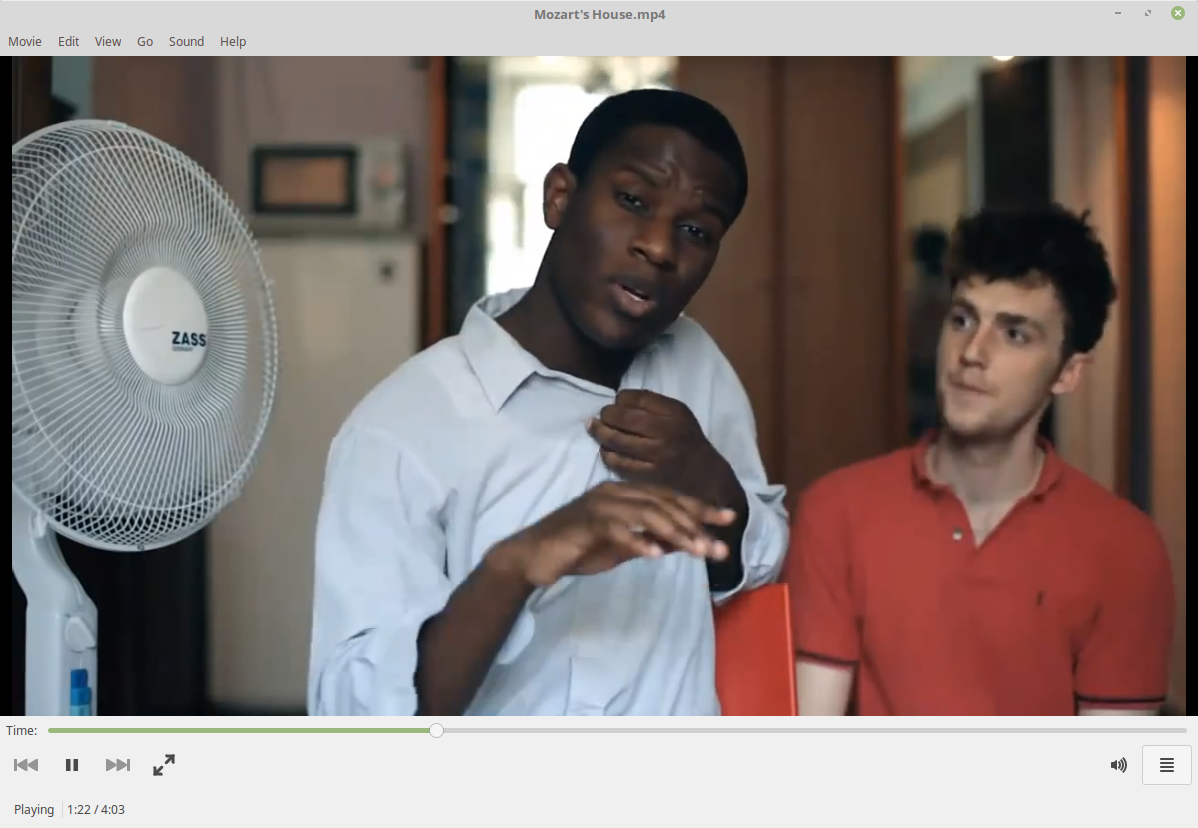
Xplayer is based on Totem and acts as the default media player for music and videos.

Watching a music video in Xplayer
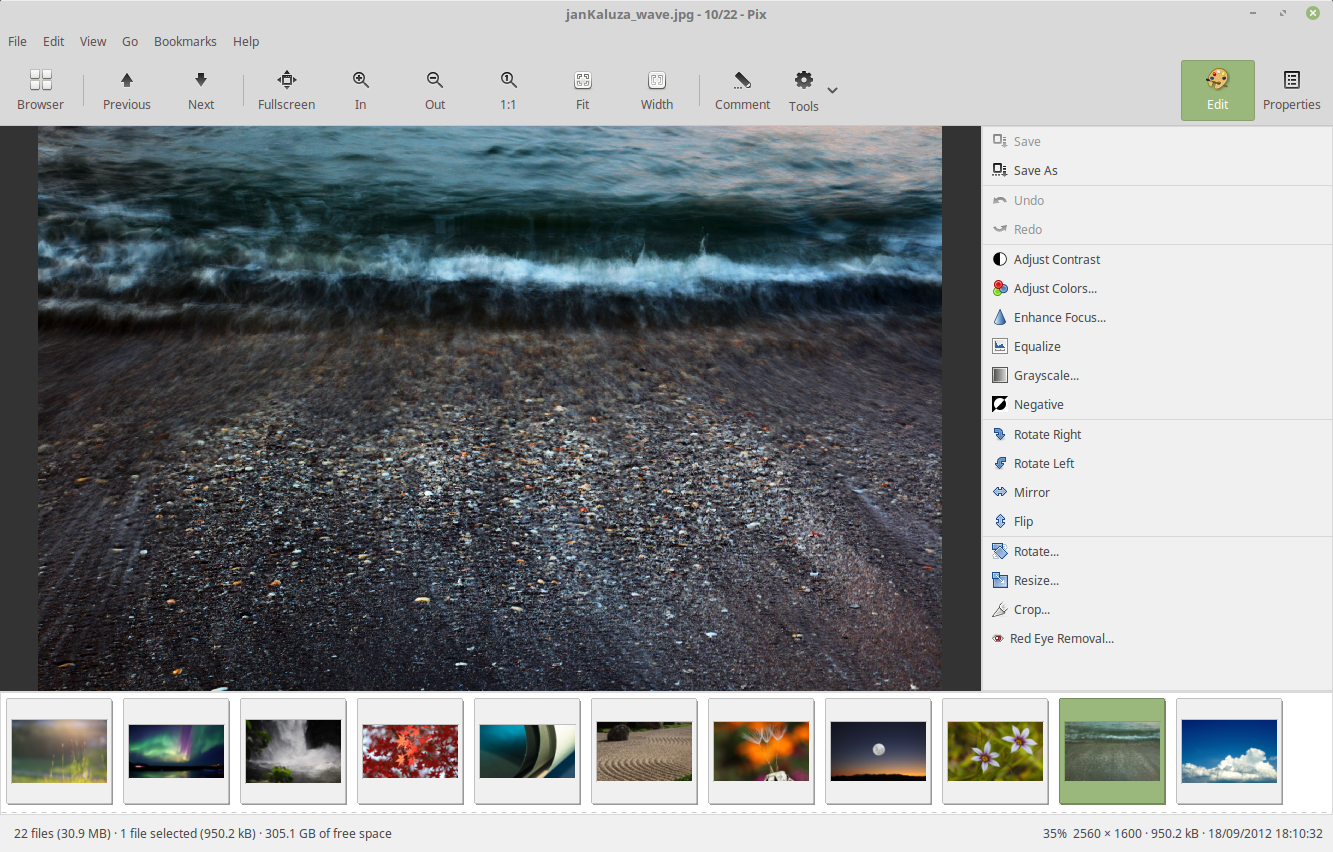
Pix is based on gThumb, which is an application to organize your photos.

Organizing pictures in Pix
Note that the GNOME apps, MATE apps and Xfce apps these X-Apps replace are still available in the repositories. You can install them side-to-side to X-Apps and compare them to decide which ones you like best. X-Apps do integrate better however with your environment, not only in obvious ways (with traditional interface) but also in the way they support desktop environments.

Update Manager

The update manager received many improvements, both visual and under the hood.
The main screen and the preferences screen now use stack widgets and subtle animations, and better support was given for alternative themes (toolbar icons are now compatible with dark themes, application and status icons are now themeable and dimmed text is now rendered with dynamic colors).
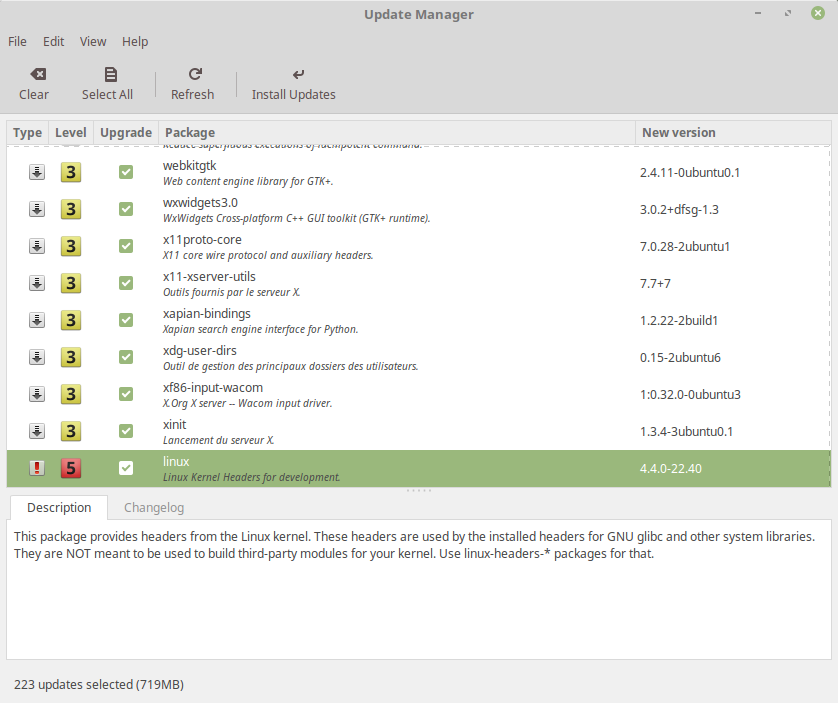
Two new settings were added to let you see and select kernel updates. Even though these aren’t really updates, but the availability of packages for newer kernels, the manager is now able to detect them and to present them for installation to you as a traditional update. These are level 5 updates but the new settings let you configure them independently.


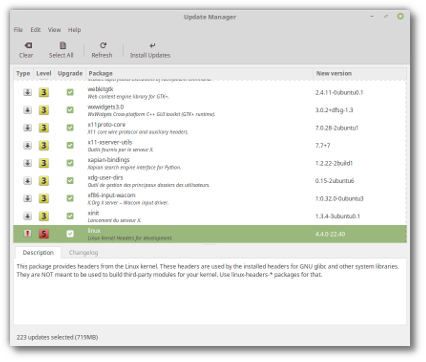
Kernel updates can be configured independently and appear as traditional updates
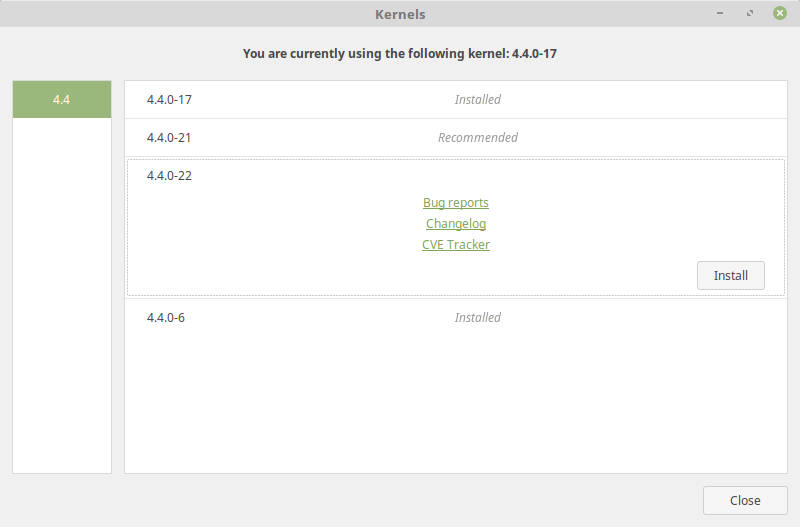
The kernel selection window was completely redesigned and is now preceded with an information screen which explains what kernels are, how to select them at boot time and what happens to DKMS modules when multiple kernels are installed.
Linux Mint no longer ships lists of fixes and lists of regressions specific to particular kernels. With so many kernel revisions, so many fixes and so many regressions happening sometimes on a daily basis, this information was quickly outdated. Instead, it was replaced with links to relevant sources of information. For instance, if you select a particular kernel you can now quickly access its changelog and see all the bug reports marked against it.


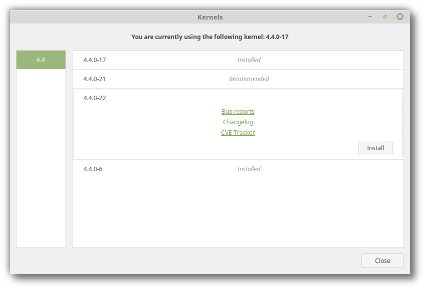
Kernel changelogs and bug reports are now quickly accessible
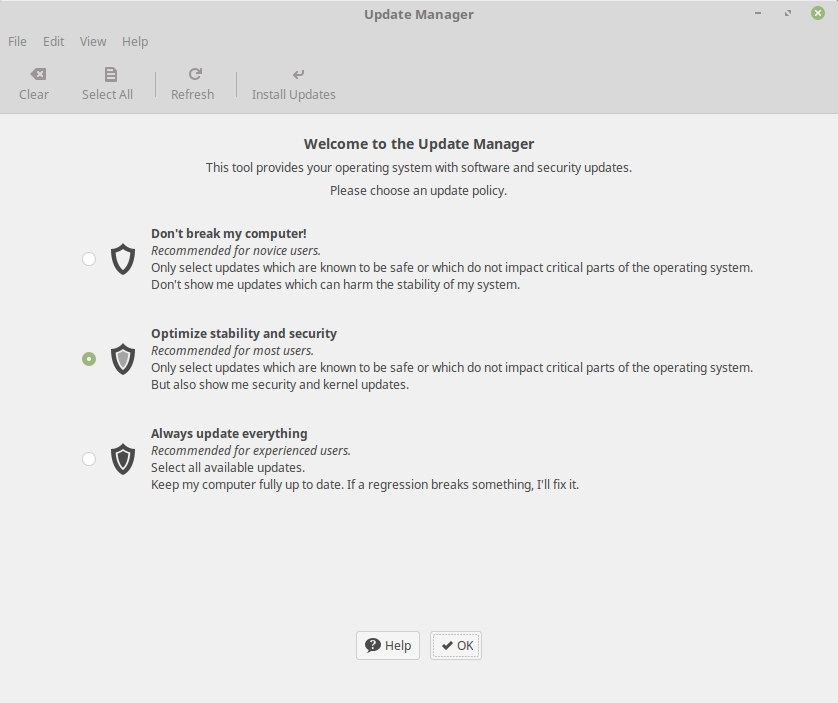
The update manager was already configurable but it wasn’t clear how to configure it, and why. In particular, the concepts of regressions, stability and security weren’t clearly explained. To raise awareness around these concepts and to show more information, a new screen is there to welcome you to the update manager and to ask you to select an update policy.

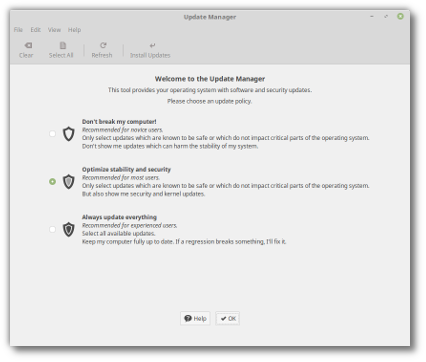
Choosing an update policy
This screen is complemented with a help section which explains what’s at play and what to consider when choosing a policy.
Although this screen is only shown once and its main purpose is to present information, it can also be used as a quick way to switch between sets of preferences and it can be launched from the Edit->Update Policy menu.

Mint-Y

In 2010, Linux Mint 10 introduced a beautiful metallic theme called "Mint-X". 6 years later trends have changed significantly. Many interfaces and websites changed their style to look more modern. 3D elements and gradients were replaced with simpler shapes, cleaner lines and plain colors.
To respond to this new trend, Linux Mint 18 introduces "Mint-Y", a brand new theme based on the very popular Arc theme from horst3180 and Sam Hewitt's beautiful set of Moka icons.
Mint-Y looks modern, clean and professional. It embraces the new trends, but without looking too "flat" or minimalistic.
There are three variations of the theme. One is light:
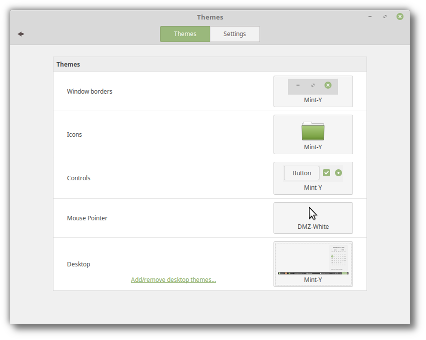

Mint-Y
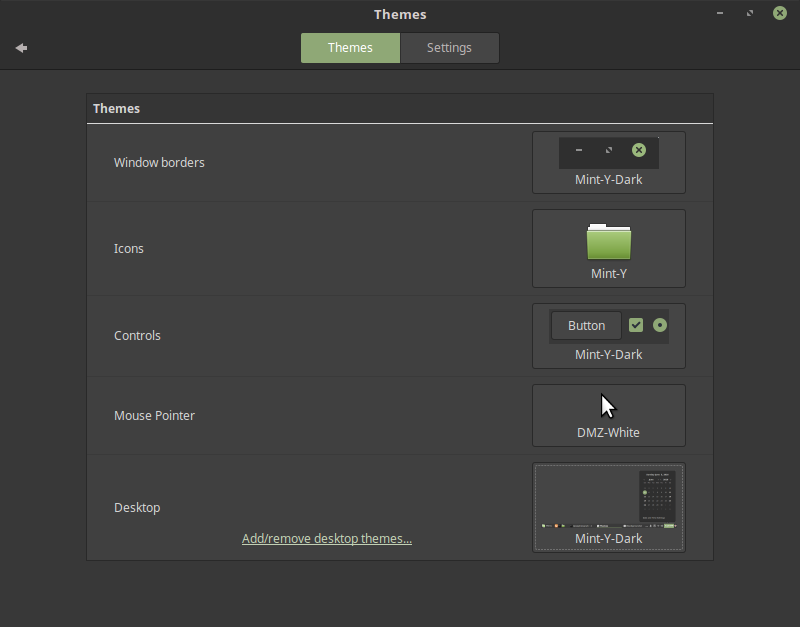
Another one is dark:
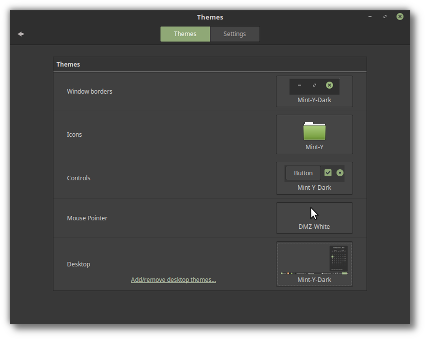

Mint-Y-Dark
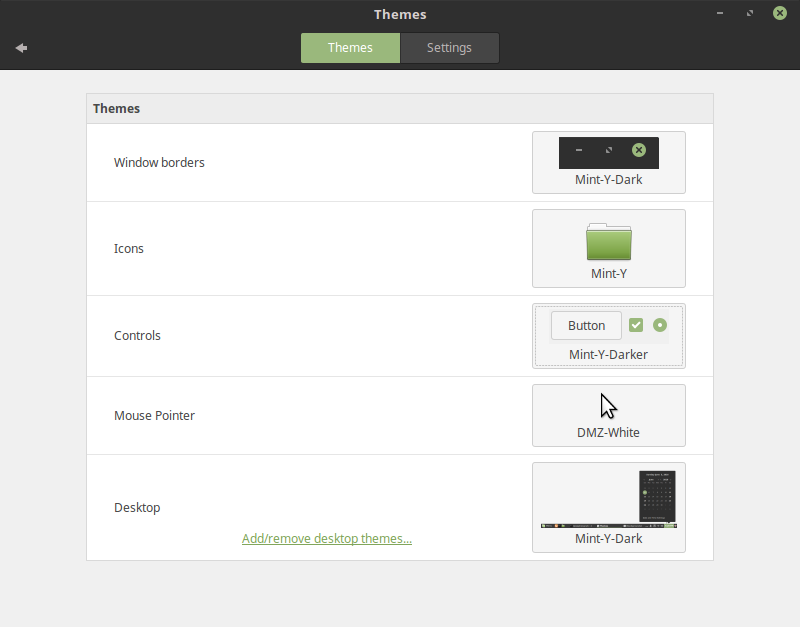
And the third one is a mix of light and dark, using light widgets but with dark titlebars/toolbars/menubars:
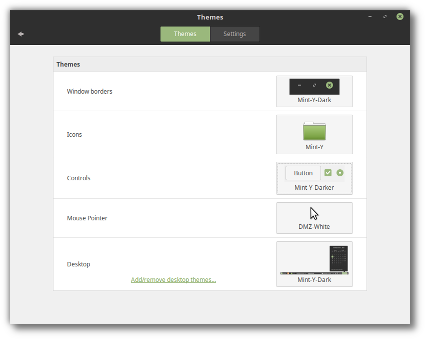

Mint-Y-Darker
Theming is a very important aspect of the operating system, because for your experience to be comfortable, your computer doesn't just need to work well, it also needs to make you feel at home. With this in mind, Mint-Y will be given time to mature and it won't replace Mint-X, but complement it.
In Linux Mint 18, both Mint-X and Mint-Y are installed, and Mint-X is still the default theme.
Mint-Y is a work in progress and it will continue to change and to improve, with your feedback, after the Linux Mint 18 release.

System improvements

In 2007, Linux Mint 3.1 introduced the "apt" command, a handy shortcut to apt-get, aptitude, apt-cache and other commands related to package management, and since then this command was improved, slightly, release after release. In 2014, Debian came up with the same idea but implemented it differently. Although their "apt" command was missing some of the features we supported, it also introduced a few improvements. The Debian "apt" command made its way into Ubuntu and many tutorials now refer to it. In Linux Mint 18, "apt" continues to support all the features it previously had, but also now supports the syntax of the Debian "apt" and benefits from the improvements it introduced. Here is an overview of some of the changes:
  • "apt install" and "apt remove" now show progress output.
  • New commands were introduced to support Debian's syntax. "apt full-upgrade" does the same as "apt dist-upgrade", "apt edit-sources" the same as "apt sources" and "apt showhold" the same as "apt held".
The add-apt-repository command now supports the "--remove" argument, making it possible to remove PPAs from the command line.
Linux Mint 18 ships with Thermald, a daemon which monitors thermal sensors and prevent CPUs from overheating.
exFAT file systems are now supported out of the box.
Btrfs support is back and installed by default again.

Artwork improvements

The default theme used in the login screen received the following improvements:
  • To prevent passwords from being typed when no users are pre-selected (thus, when the login screen is waiting for a username to be typed or selected), no dialog is shown by default. Instead, the login screen suggests to select a user. Cases where usernames need to be typed (for instance for LDAP users) are still supported, but you need to press F1 before you can type on the keyboard.
  • Slight improvements were made in the way elements of the login screen appear on the screen, giving the theme extra polish and better quality.
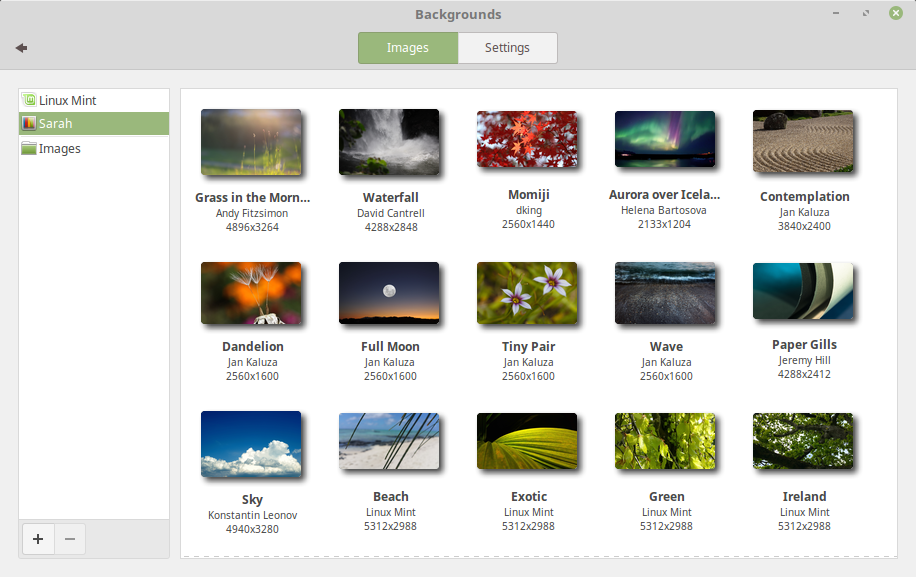
Linux Mint 18 features a superb collection of backgrounds from Andy Fitzsimon, Helena Bartosova, David Cantrell, dking, Jeremy Hill, Jan Kaluza , Konstantin Leonov, Rene Reichenbach, and Sezgin Mendil.


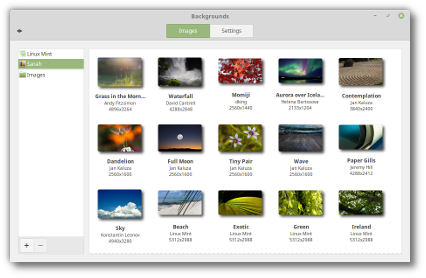
An overview of some of the new backgrounds

Other improvements

HiDPI support is largely improved in Linux Mint 18. Firefox, all the XApps (Xed, Xviewer, Xreader, Xplayer, Pix) and most of the Mint apps (mintdesktop, mintsystem, mintwelcome, mintlocale, mintdrivers, mintnanny, mintstick, mint-common, mintupdate, mintbackup and mintupload) migrated to GTK3.
Popular applications such as Steam, Spotify, Dropbox or even Minecraft were added to the Software Manager and are now easier to install.
All editions now support OEM installations.
Gufw, the graphical firewall configuration tool, was added to the default software selection and is now installed by default.

Main components

Linux Mint 18 features Cinnamon 3.0, MDM 2.0, a Linux kernel 4.4 and an Ubuntu 16.04 package base.

LTS strategy

Linux Mint 18 will receive security updates until 2021.
Until 2018, future versions of Linux Mint will use the same package base as Linux Mint 18, making it trivial for people to upgrade.
Until 2018, the development team won't start working on a new base and will be fully focused on this one.

Source Linuxmint.com

Search This Blog

Powered by Blogger.

Blog Archive